
The Raggedy kids are finished and dancing their way across their background fabric. Now it is time to start the patchwork part of the quilt. They will next be outlined with a thin satin stitch.


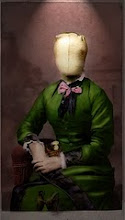
 Here she is...ready to be stitched in place. This was a whole morning's work. Now I am ready for a break. I will continue her tomorrow.
 Making the applique will take a bit of time. Each little piece of Raggedy Ann is drawn, cut out and ironed in place. At that point, each piece will need to be stitched in place. That will take several hours. So far, I like how she is taking shape. Now, to cut out her dress and apron.
 Today I begin a new quilt. This one is special....a special quilt for a special little girl. I received a piece of wall paper from a friend to be used as inspiration for her daughter's quilt. Zoe is moving to a big girl bed and Raggedy Ann and Andy will be moving with her.
 I pulled out all of my scraps that had red in the pattern and started to piece together a scrap quilt for my sewing room with my redwork patch in the center. I have no plan in mind....I am just adding as I go. The final result is still a mystery....but here is how it has progressed:
 With eyes skyward, I could almost imagine the warmth with which this sun has enveloped me in days past. Not so today. No warmth is felt through this frosty blanket of frigid air that forms an impenetrable barrier between me and the sun. And so I will wait, for warmer days ahead....and today I will appreciate the beauty that winter brings.
 On the way to the duck pond, I stopped to look at the grass growing along a small stream that feeds the pond. This stream emanates from an underground spring that bubbles up beneath the 200+ year old log cabin on our property. The moisture has crystallized on the grass this frigid morning. And, the leaves are decorated with a sugar coating of frost.

 While visiting my friend, Steph's vintage ephemera blog, I came upon a picture of an old redwork pattern. How on earth did Steph find this...it is actually a picture of ME! So I decided that my next quilt will be a self-portrait quilt for my sewing room. I will use all of the little scraps that I have left over from other projects and do a patchwork quilt around this piece of redwork embroidery that I have started.


Here is the cover

Here I am.....page 131.

 My world is a monochromatic postcard today....in shades of white and grey. The morning started out foggy...then the fog froze on the trees and gave the world a frosted appearance. Now it is cold and snowy...a great day to stay indoors and play. The "girls" and I braved the snow and went for our daily walk. It was quite beautiful...austere and beautiful.
 I would be sewing now, if it weren't for the fact that my machine is in the hospital. I thought of paying it a visit today....but decided instead to just wait for its' recovery, when I can finally bring it back home.
 I thought I would show you how those sprouts are coming along. I have just simply rinsed them and drained them....allowing them to stand in about a teaspoon of water...two or three times each day.


Here she is.....my egg-laying Rhode Island Red....and no coop to clean!
Today was an extremely cold one! I ran a few errands and was so happy to once again be snuggly warm at home. I lost a good friend today...no, nothing serious, but my embroidery machine went kaphlooey...so I had to run it to my favorite quilt store for service. Thank goodness for back-up machines!! Oh, and while I was at the quilt store, of course I found some yummy fabrics.

 We are heading into the coldest part of the Winter, and I am dreaming of Summer. Bonne of Bonne's Abode (fellow farmgal friend) got a few of us started on a dress sewing craze. I headed out yesterday to find a pattern and wound up with this sun dress pattern, black polka dot fabric and black and white flowered fabric. Three hours later.....a dress for summer. And the amazing thing is....it fits!

 Here is the start of today's project. I have arranged the different parts of this chicken onto chickenwire fabric. Next I will stitch around each part. Once this piece is finished I will add some border prints and finish it to be used as a quilted wall hanging in the kitchen of our log home (under construction). This chicken is a companion to the one that I made into a quilt a couple of months ago. This chicken reminds me of our Rhode Island Reds.
I feel so passionately about each of us assuming responsibility for our environment. Years and years of carelessness has brought our earth to a crisis point. Only a dedicated change in our behavior can restore the health of our planet. Please join me in doing this one little thing that can have far-reaching effects. I will continue to collect these towels and make them available to you if you will commit to buying no more paper towels.
If you are interested (and I hope that you all are)...please email me and I can send you some towels. I ask only that you help me with the shipping cost....and of course that you refuse to buy any more paper towels.
e-mail me here


 measured 9" by 18" and placed it in the middle of the fat quarter.
 shown. Place lining rectangle inside of outer rectangle....wrong sides together to form a pouch with open sides.
 Finish sides of your cozy by stitching a seam close to the edge to hold lining to front.
 Add drawstring.


 To celebrate my love of teas my next project is going to be a mini quilt that I will use on my table when serving tea. It will consist of 4 main appliqued squares set on point...the sashing and trim in coordinating fabrics (yet to be planned). Here is the start of the four blocks....

Grilled Chicken with Mango/Pomegranate Salsa
1/2 cup chopped,fresh pineapple
1/4 cup chopped,fresh mango
1/4 cup fresh pomegranate
1/4 C. chopped fresh cilantro
3 Tablespoons chopped red onion
2 tablespoons chopped serrano pepper
salt and pepper
juice of 1/2 lime
Combine above ingredients and serve on top of grilled chicken. I marinade my chicken first in a local Greek Dressing and then cook on my Cuisinart griddle/grill (works like a George Forman grill....locks in the juices). I served this with a spinache salad with avocado slices, pomegranate, almond slices and dressed with sesame seeds and a fresh French Herb Vinaigrette. Paired with Simi Russian River Chardonnay....this dinner was fabulous!
French Herb Vinaigrette
1/4 cup red wine vinegar
1/2 cup Extra Virgin Olive Oil
2 T. fresh lemon juice
1 t. sugar
salt and pepper
2 cloves of garlic....minced
1 tsp. fresh thyme
1 tsp. fresh parsley
1 tsp. fresh chopped rosemary leaves
Enjoy......this meal is so fresh and bursting with flavor and anti-oxidants....yummy and healthy, too.

 If you are interested in making this quilt....leave me a comment and I will have a drawing for a set of pre-cut rectangles of all these fruits and veggies.
 Well, I started watching the Penn State vs. USC game (Rose Bowl) and gave up at half time....my oh my, Penn State looks terrible (apparently things got a bit better in the second half). So, I moved myself up to my sewing room and assembled my mason jars....
 Start by sewing squares B onto A in the top corners (right sides facing) diagonally across square. Fold corner to outside and press. Repeat the same with squares C onto lower 2 corners of A. With right sides together, sew G to each side of A.
 Assemble blocks in a row and add sashing between rows.


